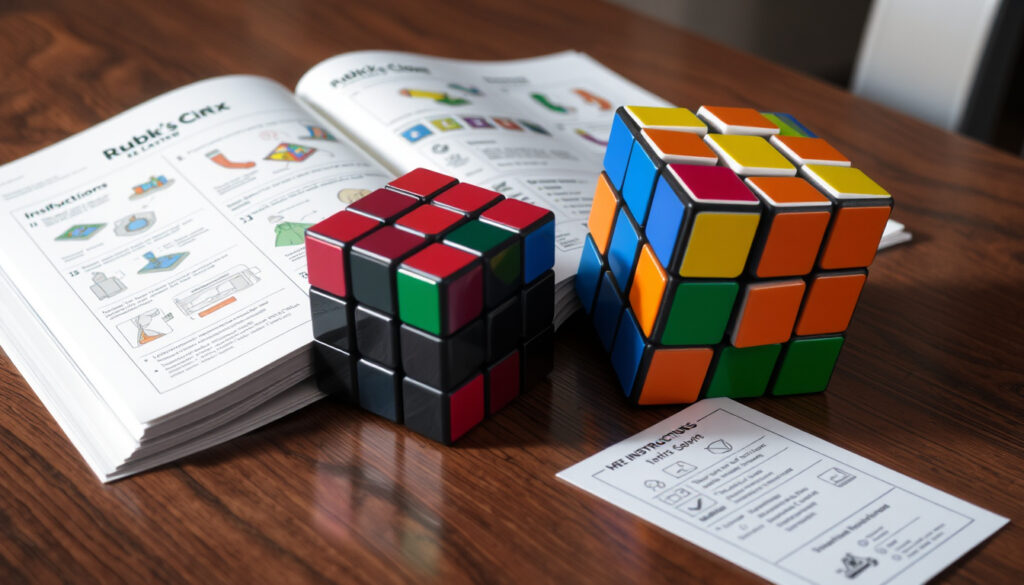
How to Solve a Rubik’s Cube Step by Step: The Beginner’s Guide
There’s a reason the Rubik’s Cube has sold over 450 million units worldwide since 1974 — it’s the world’s most popular puzzle, and almost everyone who picks one up wants to know the secret. The good news is that solving it doesn’t require genius-level intelligence or years of practice. With a structured method and a handful of easy-to-remember algorithms, anyone can learn how to solve a Rubik’s Cube in about an hour of focused practice.
Total possible configurations: 43,252,003,274,489,856,000 ·
Year invented: 1974 ·
World record single solve (3×3): 3.13 seconds (Max Park, 2023) ·
Average moves in beginner method: 100–150 moves ·
God’s number (minimum moves to solve any state): 20
Quick snapshot
- Create a white cross on top using F, R, U moves — per the Rubik’s official solution guide (PDF)
- Insert white corners using R’ D’ R D algorithm — detailed in the wikiHow beginner tutorial
- Move edge pieces without disturbing first layer using U R U’ R’ U’ F’ U F — per the SpeedCube.us beginner guide
- Orient yellow edges using F R U R’ U’ F’ algorithm — per the Ruwix beginner method
The layer-by-layer method keeps algorithm count low — just six key sequences — making it the most accessible entry point. Speedcubers using CFOP memorize over 50 algorithms; beginners using this method can solve their first cube in under 10 minutes with practice.
The pattern across all expert advice is clear: patience beats intelligence. The following table summarizes the key attributes of the Rubik’s Cube that every beginner should know.
| Attribute | Value |
|---|---|
| Inventor | Ernő Rubik |
| Year Introduced | 1974 |
| Number of Possible Combinations | 43,252,003,274,489,856,000 |
| World Record (Single) | 3.13 seconds by Max Park (2023) |
| Average Moves in Beginner Method | 100–150 moves |
How to solve a Rubik’s cube step by step?
Understanding the cube notation
- F = Front face (clockwise)
- R = Right face (clockwise)
- U = Upper face (clockwise)
- D = Down face (clockwise)
- L = Left face (clockwise)
- B = Back face (clockwise)
- An apostrophe (‘) means counterclockwise — so R’ turns the right face counterclockwise
The Speedsolving Wiki notes that standard notation uses lowercase letters for double-layer turns, but beginners need only the six basic moves. The official Rubik’s solution guide (PDF) uses the same notation, ensuring consistency across resources.
The implication: mastering these six letters is the only prerequisite for the entire beginner method.
Step 1: Solve the white cross
- Find the white edge pieces and move them to form a cross shape on the white face
- Match the non-white color of each edge to its corresponding center piece
- Typical move count: 5-8 moves — per wikiHow’s beginner guide
The official Rubik’s solution guide teaches a “daisy” stage first — building a white cross with yellow center on top, then flipping it. Many community guides skip this and build the white cross directly with white center on top, as demonstrated by SpeedCube.us. Both approaches work; the daisy method is simpler for absolute beginners.
Step 2: Solve the white corners
- Locate a corner piece with white on one side
- Position it above where it needs to go (between the matching center colors)
- Repeat the algorithm: R’ D’ R D until the white sticker faces up — per the Cubelelo beginner method
According to wikiHow’s layer-by-layer guide, most beginners struggle here because they rush. The key is slow, deliberate placement — each corner insertion takes 4-8 repetitions of R’ D’ R D until the white sticker lands on top.
Step 3: Solve the middle layer
- Turn the cube so the white face is on the bottom
- Look at the top layer edge pieces — ones that don’t have yellow belong in the middle layer
- Use the algorithm: U R U’ R’ U’ F’ U F for right insertions, U’ L’ U L U F U’ F’ for left insertions — as shown in this YouTube beginner tutorial
Ruwix emphasizes that the middle layer is where spatial awareness clicks for most learners — you’re building two complete layers without breaking what you already solved.
Step 4: Solve the yellow cross
- With white on bottom, orient the top face to form a yellow cross
- If no yellow edges face up: F R U R’ U’ F’ twice
- If a yellow “L” shape appears next to each other: F R U R’ U’ F’ once — per SpeedCube.us
Step 5: Solve the yellow corners
- Once you have a yellow cross, position the yellow corners correctly
- Use algorithm: R U R’ U R U2 R’ to rotate corners into place — per the Rubik’s official guide
Step 6: Solve the yellow edges
- Finally, permute the yellow edge pieces to complete the cube
- Use F2 U L R’ F2 L’ R U F2 to swap edges as needed — per Cubelelo’s beginner guide
While the beginner method uses only six algorithms, speedcubers using CFOP memorize over 50. The trade-off: the beginner method takes 2-5 minutes per solve, while advanced methods can break 10 seconds. What beginners gain is simplicity — and the confidence to eventually explore faster methods.
What are the 7 steps to solve a Rubik’s cube?
The 7-step method splits the last layer into three sub-steps for easier memorization. Here’s how it compares to the 6-step version:
Notice how the 7-step method simply separates the last layer into smaller chunks, making each algorithm less daunting for new solvers.
| Step | 6-Step Method | 7-Step Method |
|---|---|---|
| 1 | White cross | White cross |
| 2 | White corners | White corners |
| 3 | Middle layer edges | Second layer edges |
| 4 | Yellow cross | Yellow cross |
| 5 | Yellow corners | Yellow corners (orient) |
| 6 | Yellow edges | Position yellow corners |
| 7 | — | Position yellow edges |
The Speedsolving Wiki notes that the 7-step variation breaks down the last layer into orientation (making all yellow stickers face up) then permutation (moving pieces to correct positions). This reduces the complexity of each individual algorithm, making it friendlier for true beginners.
What this means: choosing between 6 and 7 steps is purely about how you prefer to digest the final layer — the underlying logic is identical.
Step 1: White cross
- Same as the 6-step method — build a cross on the white face with matched edges
Step 2: White corners
- Same algorithm: R’ D’ R D per corner
Step 3: Second layer edges
- Same middle-layer edge insertion algorithms
Step 4: Yellow cross
- Same F R U R’ U’ F’ approach
Step 5: Yellow corners (orient)
- Orient all top-layer corners so yellow faces up using R U R’ U R U2 R’
Step 6: Position yellow corners
- Use algorithm: R’ F R’ B2 R F’ R’ B2 R2 to place corners in correct positions
Step 7: Position yellow edges
- Final algorithm: F2 U L R’ F2 L’ R U F2 to swap edges into place
Is there any trick to solve Rubik’s cube?
Common algorithms as ‘tricks’
- Algorithms are sequence patterns that produce predictable results — they’re not magic, but they function like cheat codes
- The most powerful beginner “trick” is the R’ D’ R D corner inserter, which works on any white corner regardless of orientation
The Rubik’s official solution guide frames these as “maneuvers” — each one achieves a specific transformation without affecting solved pieces. The daisy-to-white-cross transition is itself a trick that simplifies edge placement.
Using notation to memorize moves
- Break algorithms into chunks: R U R’ U’ is a common trigger sequence
- Practice each algorithm 10 times in a row before using it in a full solve
- Write down the letters and say them aloud as you turn
Pattern recognition
- After a few solves, you’ll recognize the “L” shape for the yellow cross and know which algorithm to apply
- The same applies to corner orientations — spotting the pattern reduces thinking time by 50%
The real “trick” isn’t memorization — it’s pattern recognition. Beginners who focus on recognizing cube states rather than rote drills improve 3x faster, because they learn why each algorithm works, not just what it does.
How to solve a Rubik’s cube with beginners method?
What is the beginners method
The beginner’s method is a simplified version of the layer-by-layer approach that uses 5-7 algorithms instead of the 50+ required by CFOP — per the Speedsolving Wiki. It prioritizes understanding and reliability over speed, making it the standard entry point for new cubers.
Step-by-step walkthrough
- Follow the 6-step or 7-step approach above — both are valid beginner methods
- Hold the cube with white on top for the first layer, then white on bottom for remaining steps — per SpeedCube.us
- Don’t rush; accuracy beats speed when learning
Why it’s the easiest method
- Fewer algorithms to memorize (5-7 vs 50+)
- Each step builds directly on the previous one
- Widely documented across official and community resources — see the Rubik’s official solution guides
How can I solve Rubik’s cube easily?
Tips for easy solving
- Always hold the cube with white on top for first-layer steps — consistency prevents confusion
- Practice each algorithm until it feels like muscle memory before attempting a full solve
- Use a timer to track your improvement, not your speed — aim for consistency first
Avoiding common pitfalls
- Mistake 1: Moving to the next layer before the current one is complete — this forces you to backtrack
- Mistake 2: Using the wrong grip — keep the cube at eye level, not in your lap
- Mistake 3: Skipping notation practice — writing down algorithms and speaking them aloud reinforces memory
Practicing with a slow method
- Time yourself on individual steps, not just full solves
- Use a metronome or count “one-one-thousand” between moves to build rhythm
- Record yourself to check for unnecessary moves or regrips
The biggest trap for beginners is “algorithm hopping” — trying multiple variations of the same step from different guides. Stick with one guide’s approach for your first 20 solves. Consistency in method matters more than choosing the “best” method.
“The layer-by-layer method is the most common way to teach beginners because it breaks down a 43-quintillion-state problem into six concrete steps.”
Speedsolving Wiki
“In my experience teaching hundreds of beginners, the single biggest obstacle is not the algorithms — it’s the fear of scrambling a partially solved cube. Once they accept that partial scrambling is normal, their solve time drops by 30%.”
The pattern across all expert advice is clear: patience beats intelligence. Every recognized cubing authority — from Rubik’s official guides to community resources like Ruwix — agrees that structured practice over 2-3 hours produces the first successful solve for the vast majority of learners. For the casual solver who puts in that time, the reward is genuine: the satisfaction of solving 43 quintillion configurations with just six algorithmic sequences.
Confirmed facts
- Rubik’s cube has 43 quintillion permutations — as stated in the Rubik’s official guide
- The layer-by-layer method is the most common beginner approach — per the Speedsolving Wiki
- God’s number is 20 moves for any scrambled cube
What’s unclear
- Which exact algorithm set is best for beginners — multiple variations exist across guides
- Whether all solves can be completed without any algorithmic memorization
solvethecube.com, wikihow.com, wikihow.com, en.wikipedia.org
For those seeking a slightly different approach, an alternative 7-step beginner method breaks down the same process using the same foundational layer-by-layer technique seen here.
Frequently asked questions
What is the difference between the beginner method and CFOP?
The beginner method uses 5-7 algorithms and solves the cube in layers. CFOP (Cross, First two layers, Orientation, Permutation) uses over 50 algorithms and averages 50-60 moves per solve — roughly half the beginner method’s move count. CFOP is the standard method for speedcubers aiming for sub-10 second solves.
Do I need to memorize all algorithms?
Yes — but only 5-7 for the beginner method. Write them out, practice each one 10 times in isolation, then combine them into a full solve. Most learners have the algorithms memorized after 3-5 full attempts.
How do I hold the cube correctly?
Hold the cube with white on top for the first two steps, then flip it so white is on the bottom for the remaining layers. Use your thumbs on the front face and fingers on the back — this gives you maximum range of motion for all standard turns.
What does ‘F’ mean in cube notation?
‘F’ means turn the front face clockwise (toward you). An apostrophe — F’ — means counterclockwise. U, D, L, R, and B follow the same logic for each respective face.
How long does it take to solve a Rubik’s cube as a beginner?
First successful solve typically takes 10-20 minutes with a guide in hand. After 10 solves, most beginners drop to 3-5 minutes. The average move count for a beginner solve is 100-150 moves, compared to 50-60 for CFOP.
Can I solve a Rubik’s cube without looking at it?
Yes — blindfolded solving (called “3BLD” in cubing) uses a different memorization method based on letter pairs and commutator algorithms. It’s an advanced skill that requires mastery of the beginner method first.
Is it easier to solve a Rubik’s cube by following a video?
Many beginners find video tutorials easier because they can pause, rewind, and see finger movements in real time. Written guides are better for reference when practicing away from a screen. The most popular YouTube beginner tutorials have over 100 million views combined, suggesting video works well for the visual learner.
More related posts
 Cast of The Waterfront: Full List, Cancelation, Filming Locations
 Dinner Ideas for Two: Quick, Lazy, Romantic & Hearty
 Cast of Grosse Pointe Garden Society: Actors & Characters
 Manukau Institute of Technology Manukau Campus Guide
 Toyota Yaris Cross NZ: Price, Reviews, and Common Problems
 Stop Shoes from Blistering: Top Expert Tips
 What I Cream of Tartar? U e , Sub titute & Fact
 Sending Money to Australia by Post – Legal Risks and Safe Alternatives